UP Di-Libot: Your UP Diliman Lakwatsa Checklist
Kyle Joseph Taton • Jose Mari Mangalindan • Last Updated June 14, 2024
I. Project Description
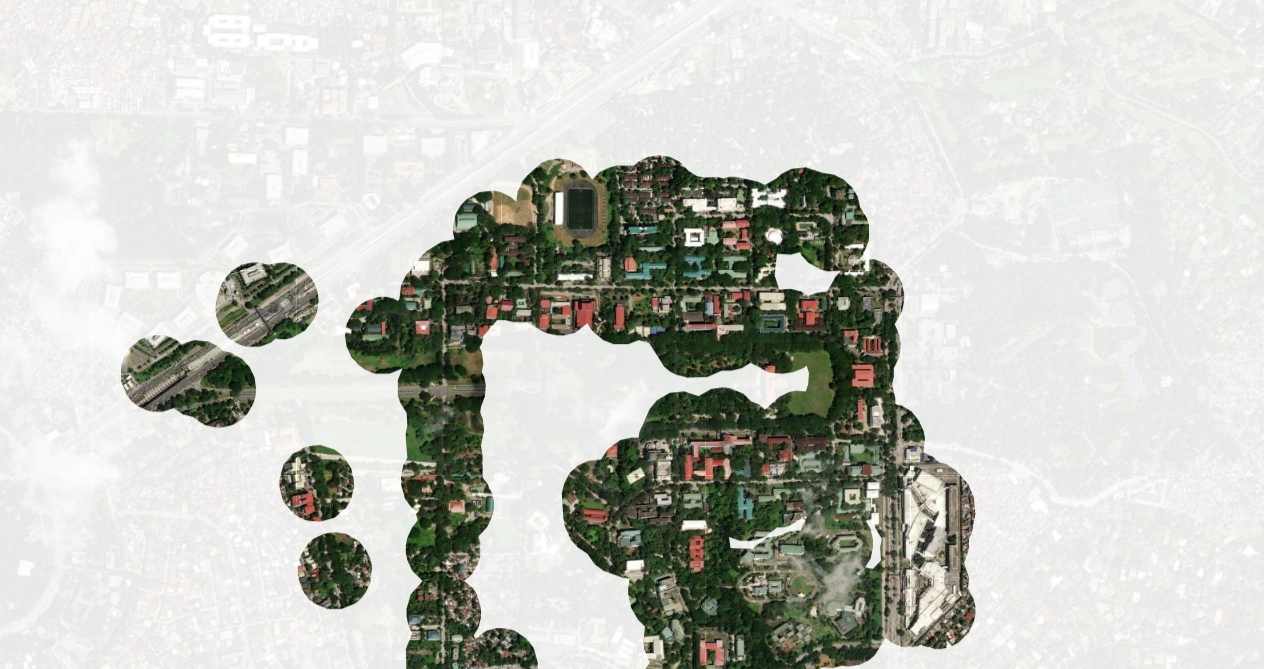
The web application maps out a UPD student’s “visiting checklist” by gathering the user’s location history data from Google Maps and marking all locations visited within the bounds of UP Diliman. After inputting the history data, the website displays a masked map of UP Diliman presenting all locations that Google Maps has tracked. In addition, another layer displays the names of buildings and institutes the user has already visited; therefore, displaying all the landmarks visited and blurring sites that have not been explored.
II. How It Works
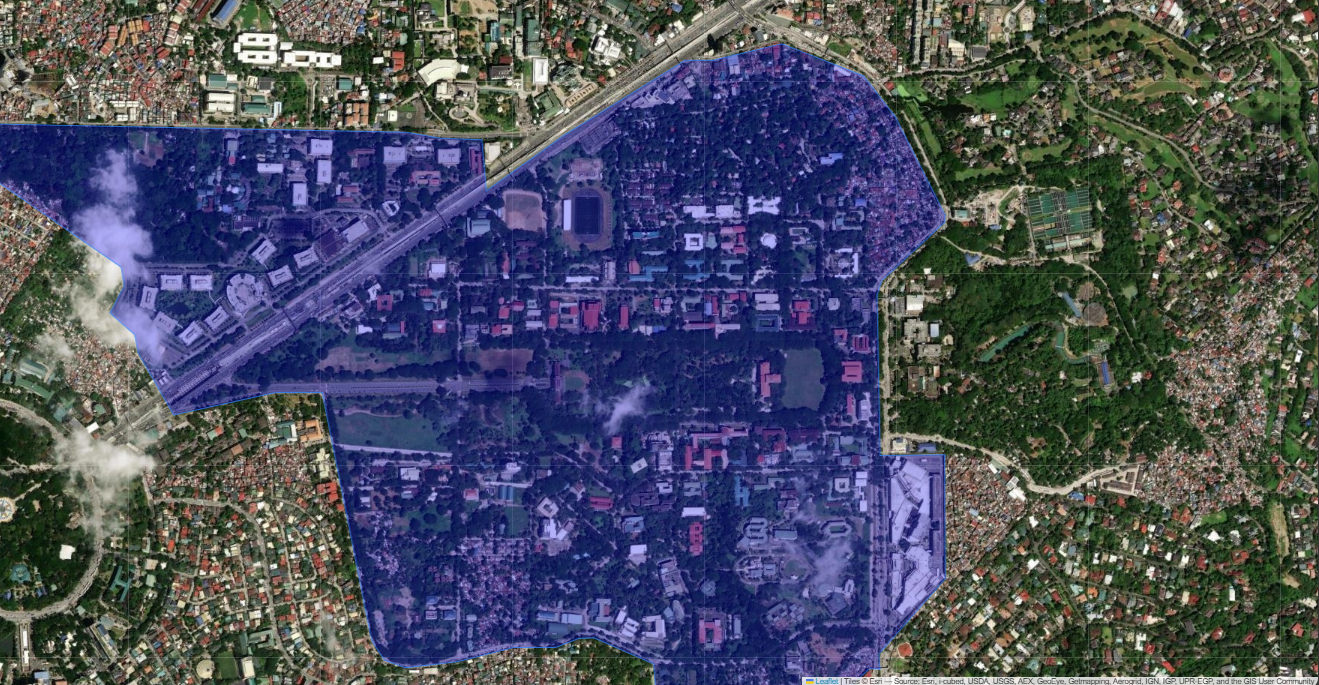
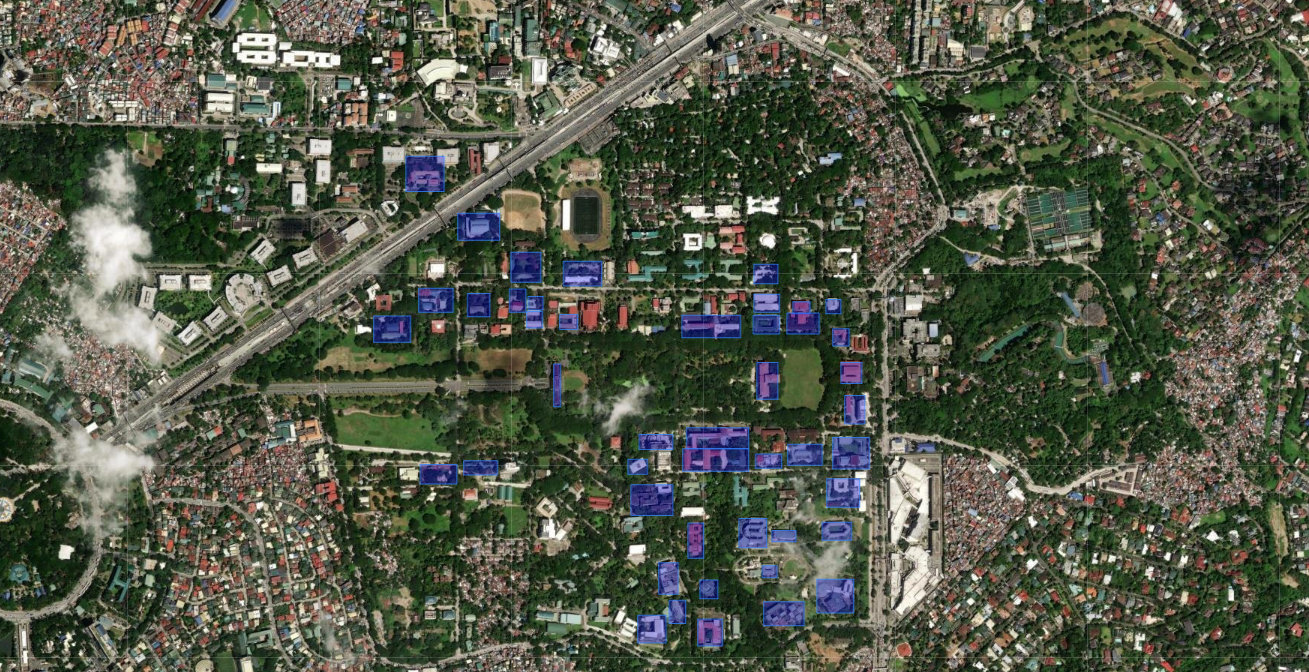
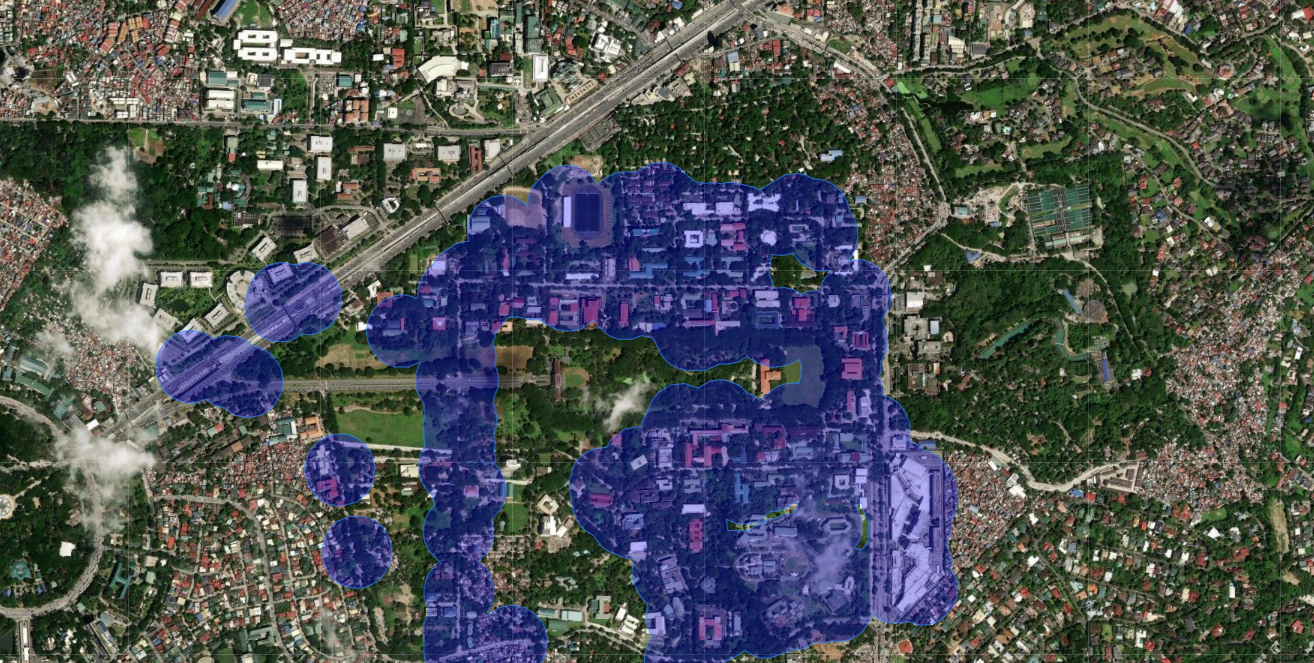
The project hails from low-resolution satellite imagery provided by ESRI, serving as the orthophoto referenced by the other integrated, makeshift data layers, such as:
- the borders of UP Diliman and its neighboring sites,

- the polygon representations of relevant infrastructures,

- and the buffered coordinates to form a conglomerate of circles, showing the sites visited.

The web application utilizes several spatial querying techniques in order to generate a white mask that blurs unexplored areas
- Filter - the borders of UP is used to select only the points within the borders
- Buffer - the points are then transformed to circle polygons with a set constant buffer radius
- Union - a single multi-polygon object is created after the points are combined
- Difference - the combined points are subtracted from the box polygon covering the whole map - revealing the explored areas
 The project was only made possible because of several open-sources projects that made the development easier.
- Leaflet is responsible for the interactive map including the map controls(base layer, overlay, zoom).
- Turf.js provided spatial querying functions and for creating the geometries and features of the overlays.
III. Downloading you data from Google
- Go to Google Takeout
- Under "Select data to include", select ONLY "Location History (Timeline)"
- Click "Next Step"
- Select the following:
Transfer to: Send download link via email
Frequency: Export once
File type: .zip
File size: 2GB
- Press "Create Export"
- Wait for an email from Google Takeout containing the download link
- Download the .zip file/s
- Extract the files
- If given multiple .zip files, combine the contents of the "Semantic Location History" folders in a single folder
IV. Using the Web Application
Using the web application is easy. Simply tick the required checbox and press the "Generate My Map" button and select the folder named "Semantic Location History". Note that your data is not uploaded to any server and processing is done by your computer, locally.
V. Considerations
A. Data Usage
Google Maps requires location access, mobile data usage, and especially, timeline recording permission from the user; the web application relies on recorded coordinates by the application as input to produce the map. If location history is turned off, then the user will not be able to see the mapped version of their visited sites.
B. Temporal Limitations
Since Google Maps tallies coordinates in irregular time intervals because of poor internet connectivity, it may not pinpoint locations that have already been visited due to said circumstance. Thus, a buffer radius is used to account for time-recording differences.
C. Spatial Accuracy
Because the Google Maps cannot accurately pinpoint the locations already visited by the user, the web application uses a normalized buffer to standardize the grace radius of the coordinates marked by Google Maps, forming a circle union. This creates an expected masked map of visited locations, as long as the map history data of the user has records of the visits.


